There are probably as many ways to make sourdough as there are bakers making it. There’s so much information, and advice ‘out there’ that one blog post hardly seems appropriate to address such a vast subject. I will try and impart what I believe are the essentials for you to achieve a decent home baked loaf, without too much hassle. Please remember that it takes an experienced baker 2 – 3 days to make a sourdough; their starter may be years, or maybe even decades old, and they have years of hard won experience, literally at their fingertips. If you don’t get an ‘expert’ loaf first time, please don’t be surprised. Try again. You will improve. And if you do despair of mastering the art, and feel sourdough is not for you, remember there is always your friendly local baker to buy your sourdough loaf from!
I’m delighted if people want to try baking bread at home and am always happy to share tips and advice. The real secret of sourdough is simply time, and that’s something a lot of us are short on in our busy lives. Bread cannot be rushed; commercial loaves are testament to that – blousy, airy things that stick to the roof of your mouth and are pumped full of unnecessary additives. Supermarket sourdoughs are no exception.
Apart from time, the one thing that is critical to any successful sourdough loaf is a proper sourdough starter. There’s not really any mystery to creating one, simply time and attention. I used to give away sour dough starters to people who asked for them, but I now sell them – for a modest sum. I supply simple instructions for keeping them alive and baking a loaf, simply because so many people asked me for them and it was costing me a lot in time and containers!
Lots of instructions are complicated and require you to be on hand for hours to turn, knead and fold the dough. Most of us don’t have time for that if we’re out at work. I’ve been making sourdough loaves for over 10 years and in my experience they need far less molly coddling than many people would have you believe. The instructions here are necessarily long, for which I make no apology, but they are not complicated, and once you have a viable starter you will be turning out loaves in no time. As long as you bake loaves regularly, can probably dispense with these instructions entirely.
So, to start with you need a lively starter. This is the most crucial part of the process and what will give you that lovely sour taste. In essence, it is merely a mixture of flour and water. What makes it ‘live’ is wild bacteria and the natural process of fermentation. You don’t need to buy any special cultures, or add anything to encourage wild yeasts. They exist in the environment.
So, this is what you need to get your starter started: a large container with a lid– a litre size will do. Many people use a Kilner jar or similar, if you do this, remove the rubber seal as a very lively starter can blow the lid if it’s sealed tight. I confess I use plastic containers. It may still get messy sometimes but at least explosions won’t cause potential damage. You’ll need some strong flour, or bread flour (the same thing, different terminology). I have many starters: rye, wholewheat, plain and combos. Chose a flour that you will enjoy eating in the final loaf. If you don’t eat wholewheat bread, don’t do a wholewheat starter. Rye is usually the most vigorous starter, and white the least, but all make viable loaves. It simply depends on what you like best. Once you’ve got one starter under your belt you can always get another one going.
You have a container, you’ve bought your flour, now all you need is some water and sometime along with a bit of alchemy, that is outside of your control.. Measuring is not absolutely critical in this initial stage. I work with tablespoons and don’t really weigh anything, but if you prefer, you can work on 50 grams of flour (roughly 3 heaped tablespoons). Add your flour to the container and add a similar amount of warm water. You can weigh it on a scale rather than using a liquid measure. Warm water is considered less than 40 °C. If it’s hotter, you can kill the yeasts and the mix won’t ferment. You can use cool water but fermentation will take longer to get going. Mix the water and flour in your container to get a thickish paste, similar in consistency to emulsion paint. Add more flour or water to achieve this consistency. I know this sounds imprecise, but different flours absorb different amounts of water, and the ambient temperature affects how much water is taken up by the flour too, so as long as you have an approximation of this consistency you should be fine.
Beat the mixture well to incorporate some air, and then close the lid. Leave it somewhere in a warmish environment. Avoid extremes of heat or cold. Check the mixture the next day and add a similar amount of flour and water, beating again to incorporate some air. Check the mixture is starting to ferment i.e. forming bubbles on the top. If it is, all well and good you can start adding to this mixture as detailed below. If it isn’t, don’t worry. It can take anywhere from a couple of hours to a few days for the mixture to ferment. If after 2 days there’s no obvious sign of fermentation try moving the container to somewhere warmer and try again.
Once you have a fermenting mixture, you need to begin ‘feeding’ it. This simply means adding daily flour and water. Add a daily dose of 50g flour and a similar similar amount of cool water. You can keep your fledgling starter at regular room temperature. Feed for 7 – 10 days. At some point you will end up with an awful lot of mixture and will need to scoop some out and add fresh. You can use this for another starter, or give it away to someone else, otherwise you will simply have to discard it. Sorry.
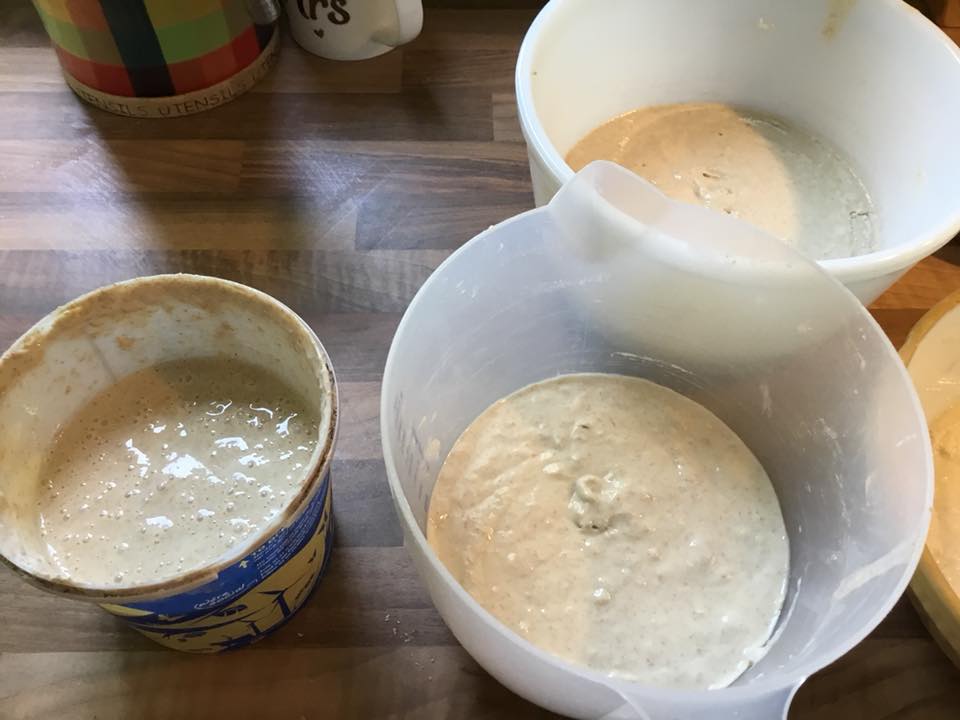
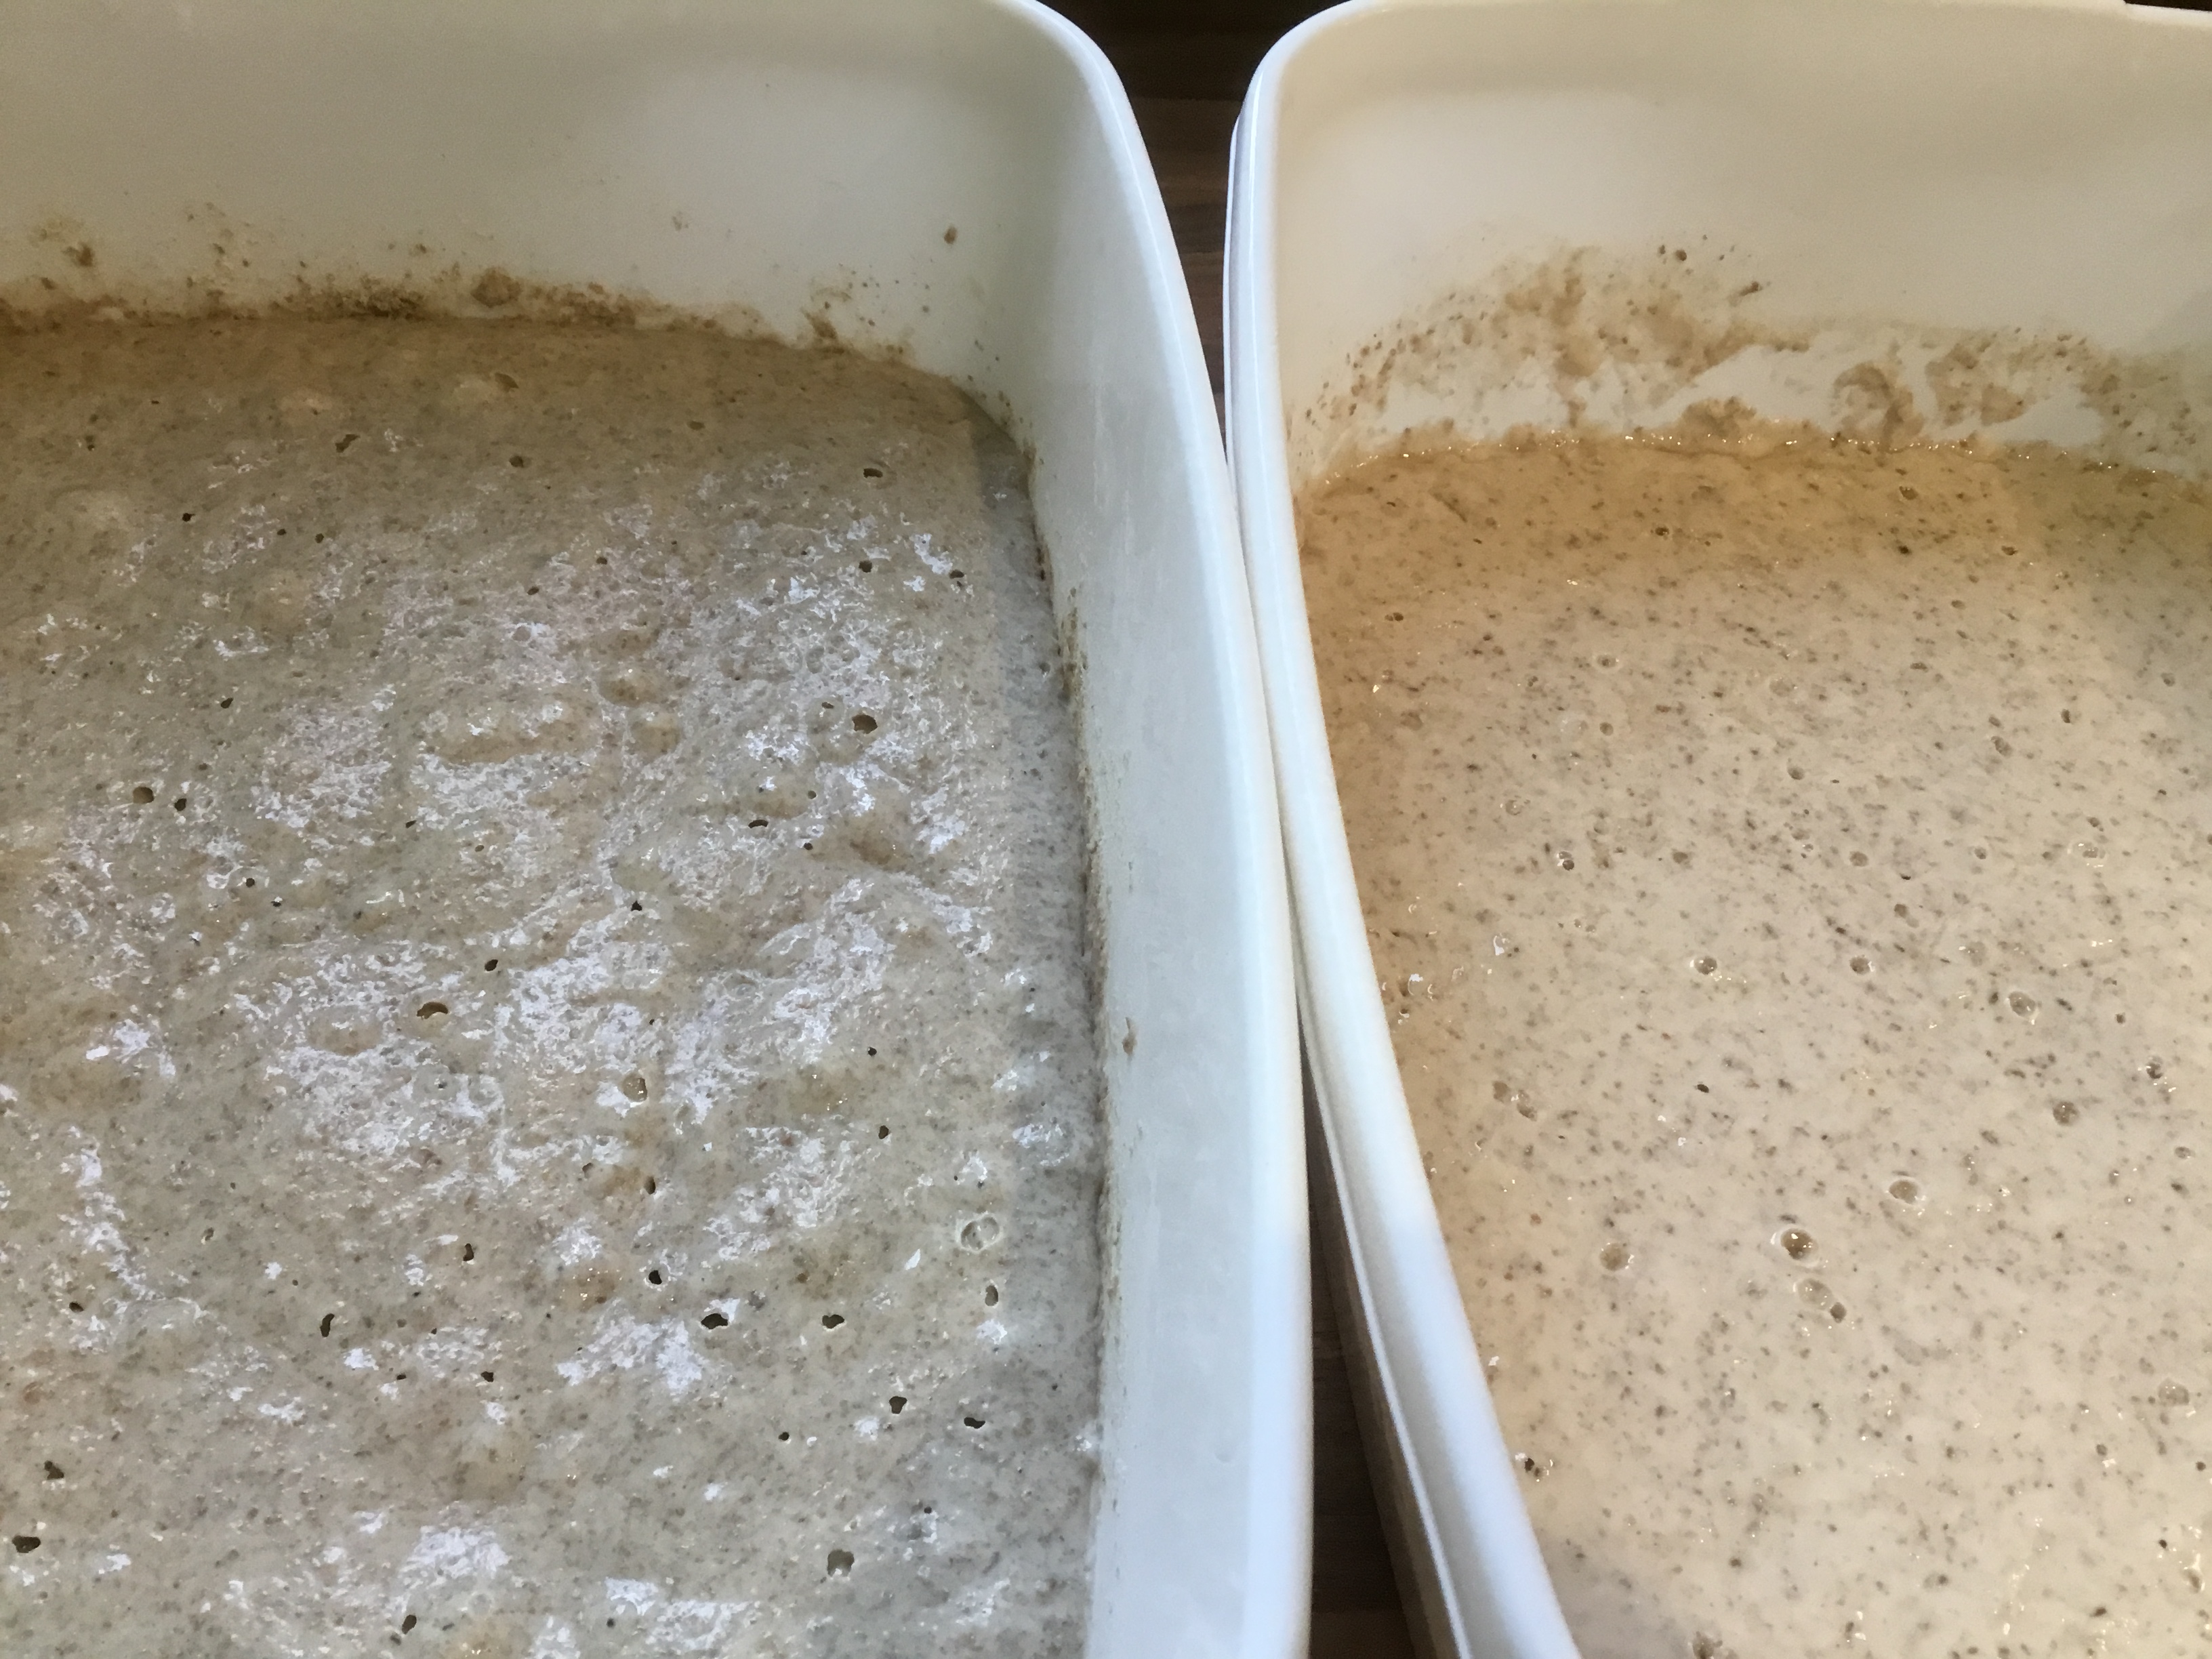
Your mixture should be bubbly, with a pleasant fruity, yeasty sort of smell. It should not be acrid or really sour. If it’s unpleasant something has gone wrong and you’ll need to start again, but hopefully you’ll have a nice smelling fully fledged starter and you are ready to make your first loaf. Congratulations!
The night before you want to bake your loaf, create the sponge: take about 100ml of your active starter, and combine it with 250g fresh flour and 300ml warm water in a large bowl. Mix thoroughly with the handle of a wooden spoon. You want to get out most of the lumps of flour, but don’t worry if you can see a few left as when you knead the final dough they will be knocked out. Cover the bowl with a damp tea towel, plastic bag or clean shower cap and leave overnight. In the morning, it should be clearly fermenting – thick, sticky and bubbly.
To make your loaf, add a fresh 300g strong flour to the sponge, along with 1 tbsp oil, (it will make the bread a touch softer and more silky, but is not essential), and 10g salt (which is essential). Squidge it all together with your hands. You should have a fairly sticky dough. I would urge you not to add extra flour at this stage as once you’ve kneaded the dough it will become less sticky. A ‘tight’ dough means a ‘tight’ loaf which will have a dense texture and not the characteristic chewy, holey structure.
Next, turn out the dough onto a lightly floured surface and knead until smooth and silky. I will be adding videos on this to my YouTube channel at some point, but what you’re trying to do is work the gluten in the flour so that it becomes smooth and elastic. It may look unpromising at this stage but stretching, pulling and turning the dough will yield this result. Push the ball of dough away from you with your dominant hand and pull it with your other hand. Pile the dough back into a ball, turn and repeat for as long as it takes. It takes in the region of 10 minutes, but it can vary depending on your own style and level of confidence. I would recommend a novice kneads for 15 minutes. This is the second most important aspect of making a good loaf. If, at this stage the dough seems too tight and firm, add a dash more warm water. If it is unmanageably loose, add more flour. It’s messy, but better than having a disappointing loaf. Leave it as wet as you dare, and don’t worry about messy fingers. This way you will get better bread. You can of course use a stand mixer with a dough hook to do this stage, but I would urge you to get stuck in and use your hands as you will understand more about the consistency of the dough this way and how to correct it.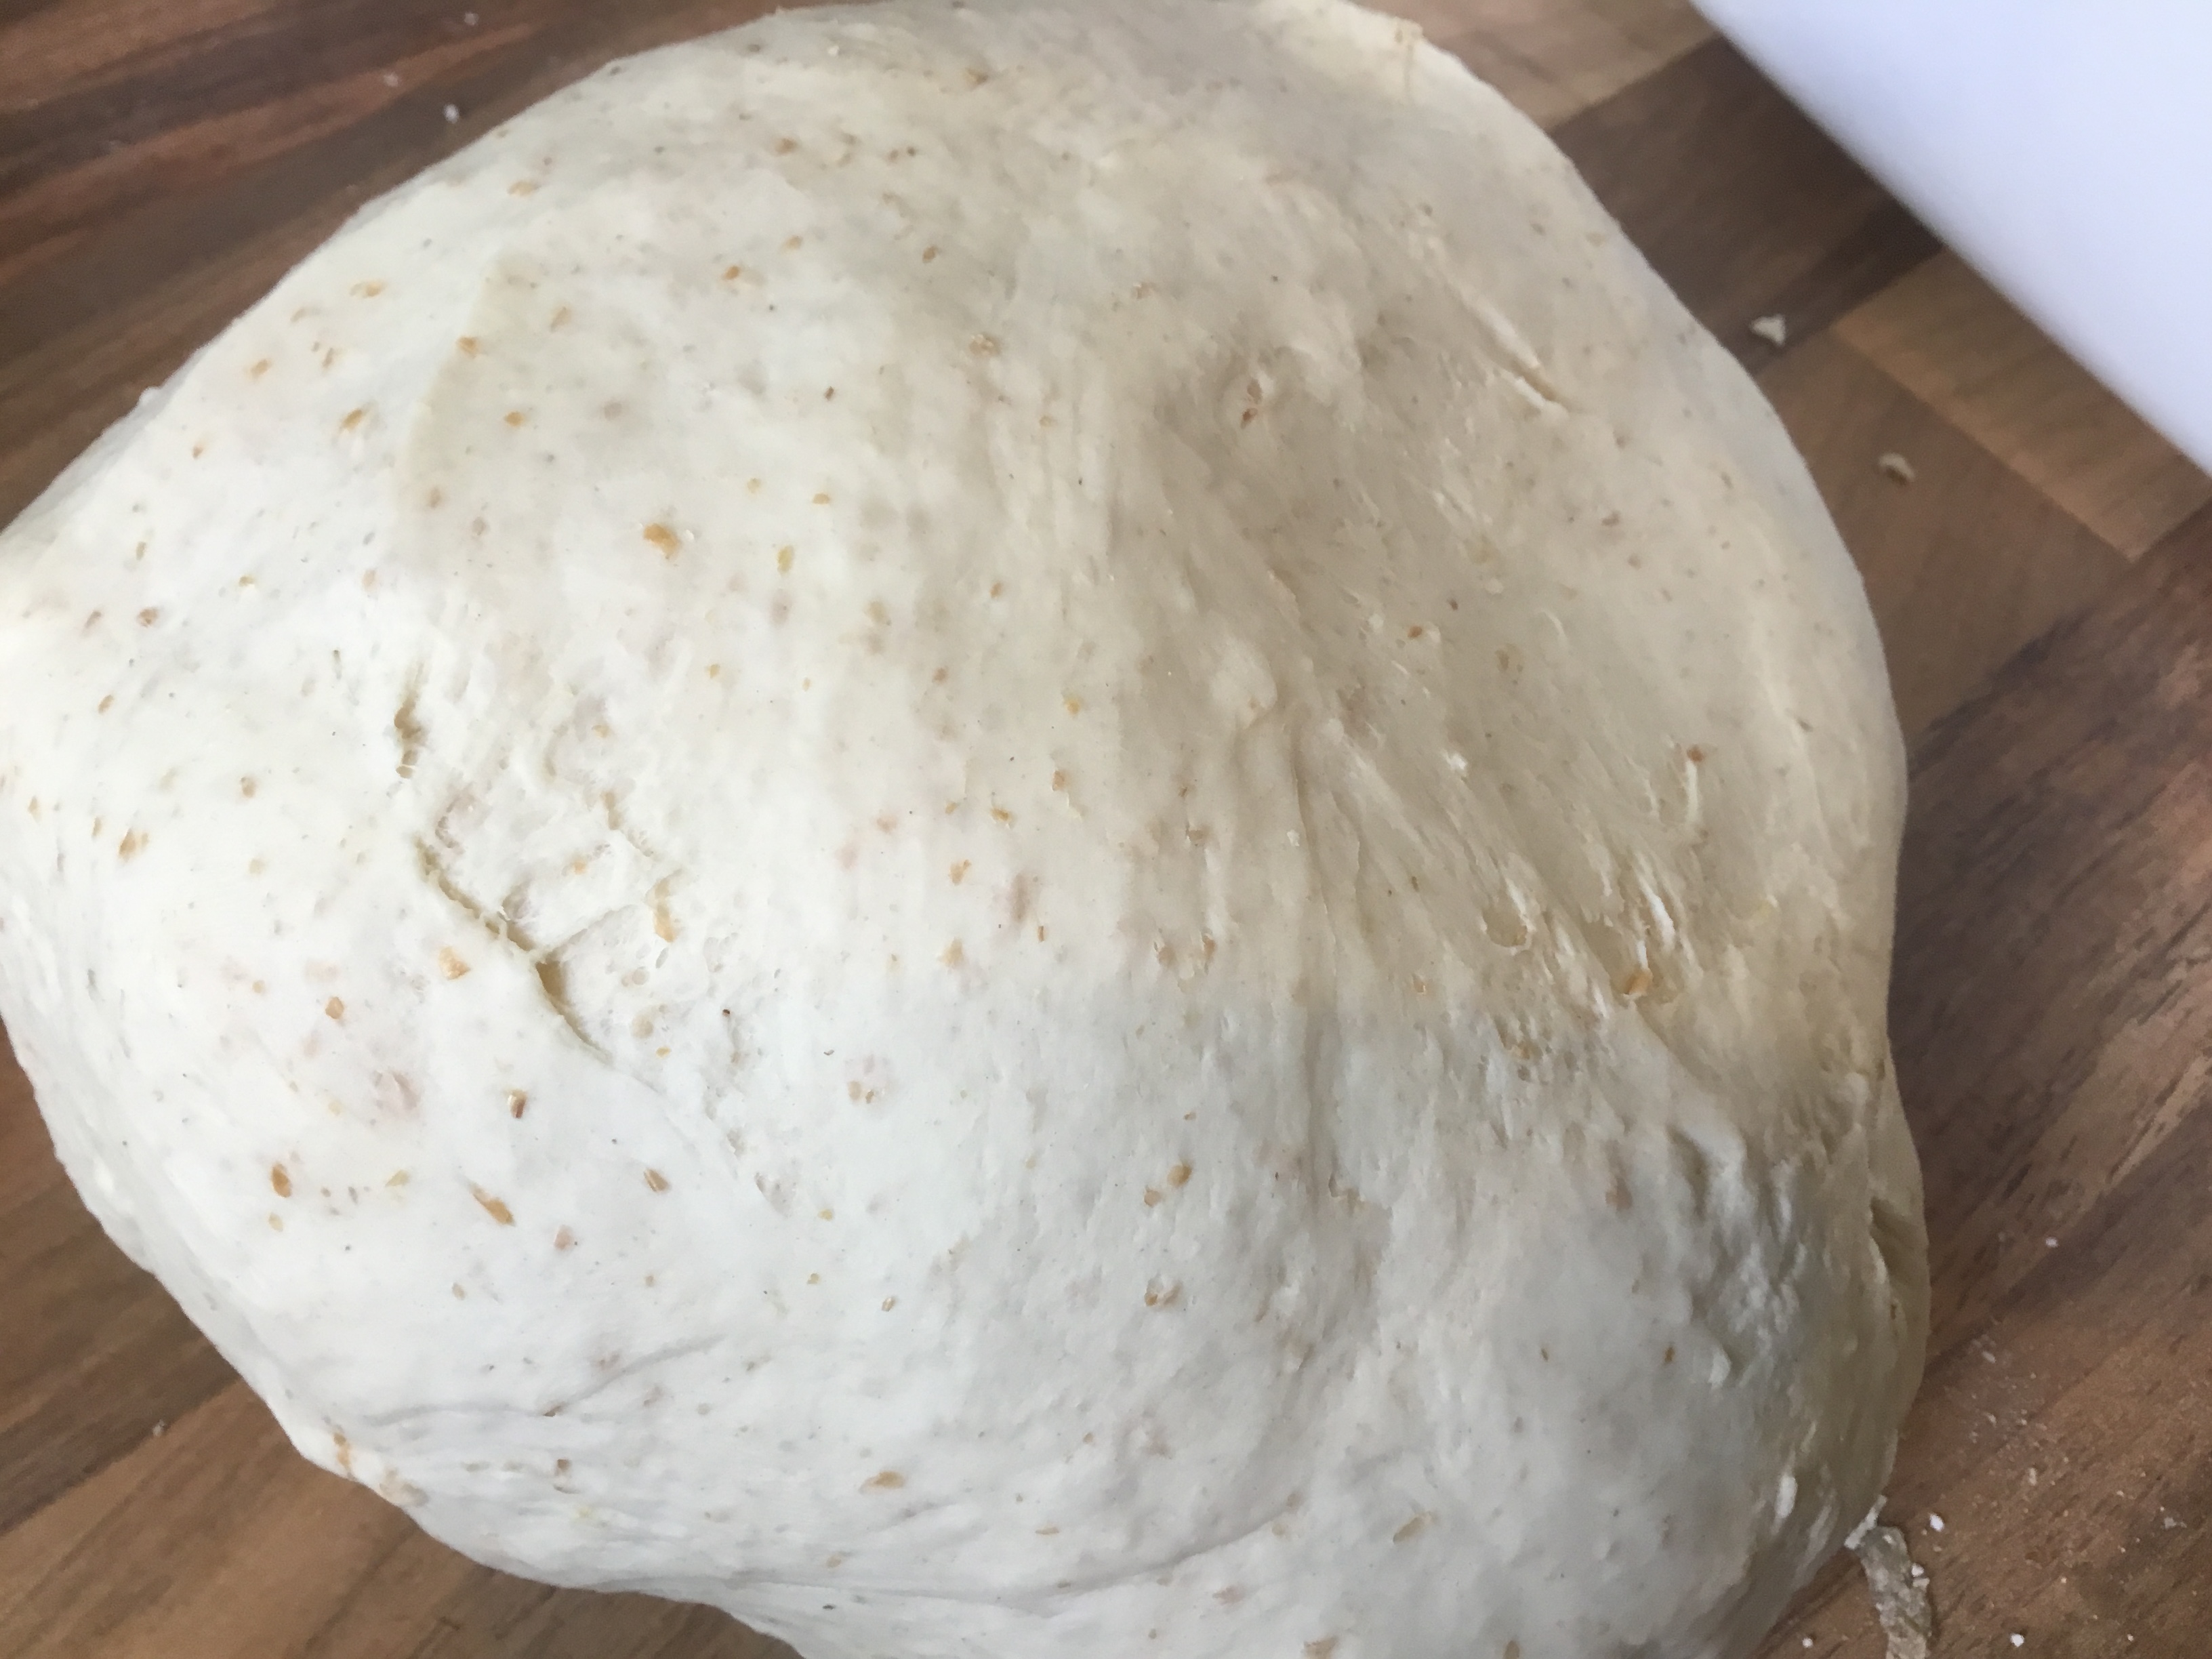
Lots of recipes will have you turning and folding your dough anything up to 12 times over the course of the next 8 hours, but trust me, it isn’t necessary. As long as you knead the dough effectively in the first instance and let it rise slowly, you will end up with a very respectable sourdough loaf.
Now put your silky dough in a lightly oiled bowl and turn it so it gets a light coating of oil. This is so the surface doesn’t dry out during the first long rise. Place the bowl inside a plastic bag, and leave to rise. Don’t expect it to shoot up to twice its original size in an hour, as a conventional loaf might. Sourdough rises slowly. The best thing is to knead it in the morning then simply leave it all day (or knead in the evening and leave overnight) in a fairly cool, but draught-free, place, until it has more or less doubled in size and feels springy when you push your finger gently into it.
Now, knock the dough back – that is to deflate it, knocking the air out of it – on a lightly floured surface.
You now need to prove the dough, that is to give it a second rising. You are also going to be forming it into the shape it will be for baking. If you have a proper baker’s proving basket, banetonne, or Brotform, use this, first dusting it generously with flour. Alternatively, you can rig up your own proving basket by lining a medium-sized, fairly shallow-sided bowl with a clean tea towel, then dusting it liberally with flour. You can cook the loaf in a cake pan or bread tin, but you won’t get the classic shape and it’s very difficult to gauge when the bread is sufficiently baked.
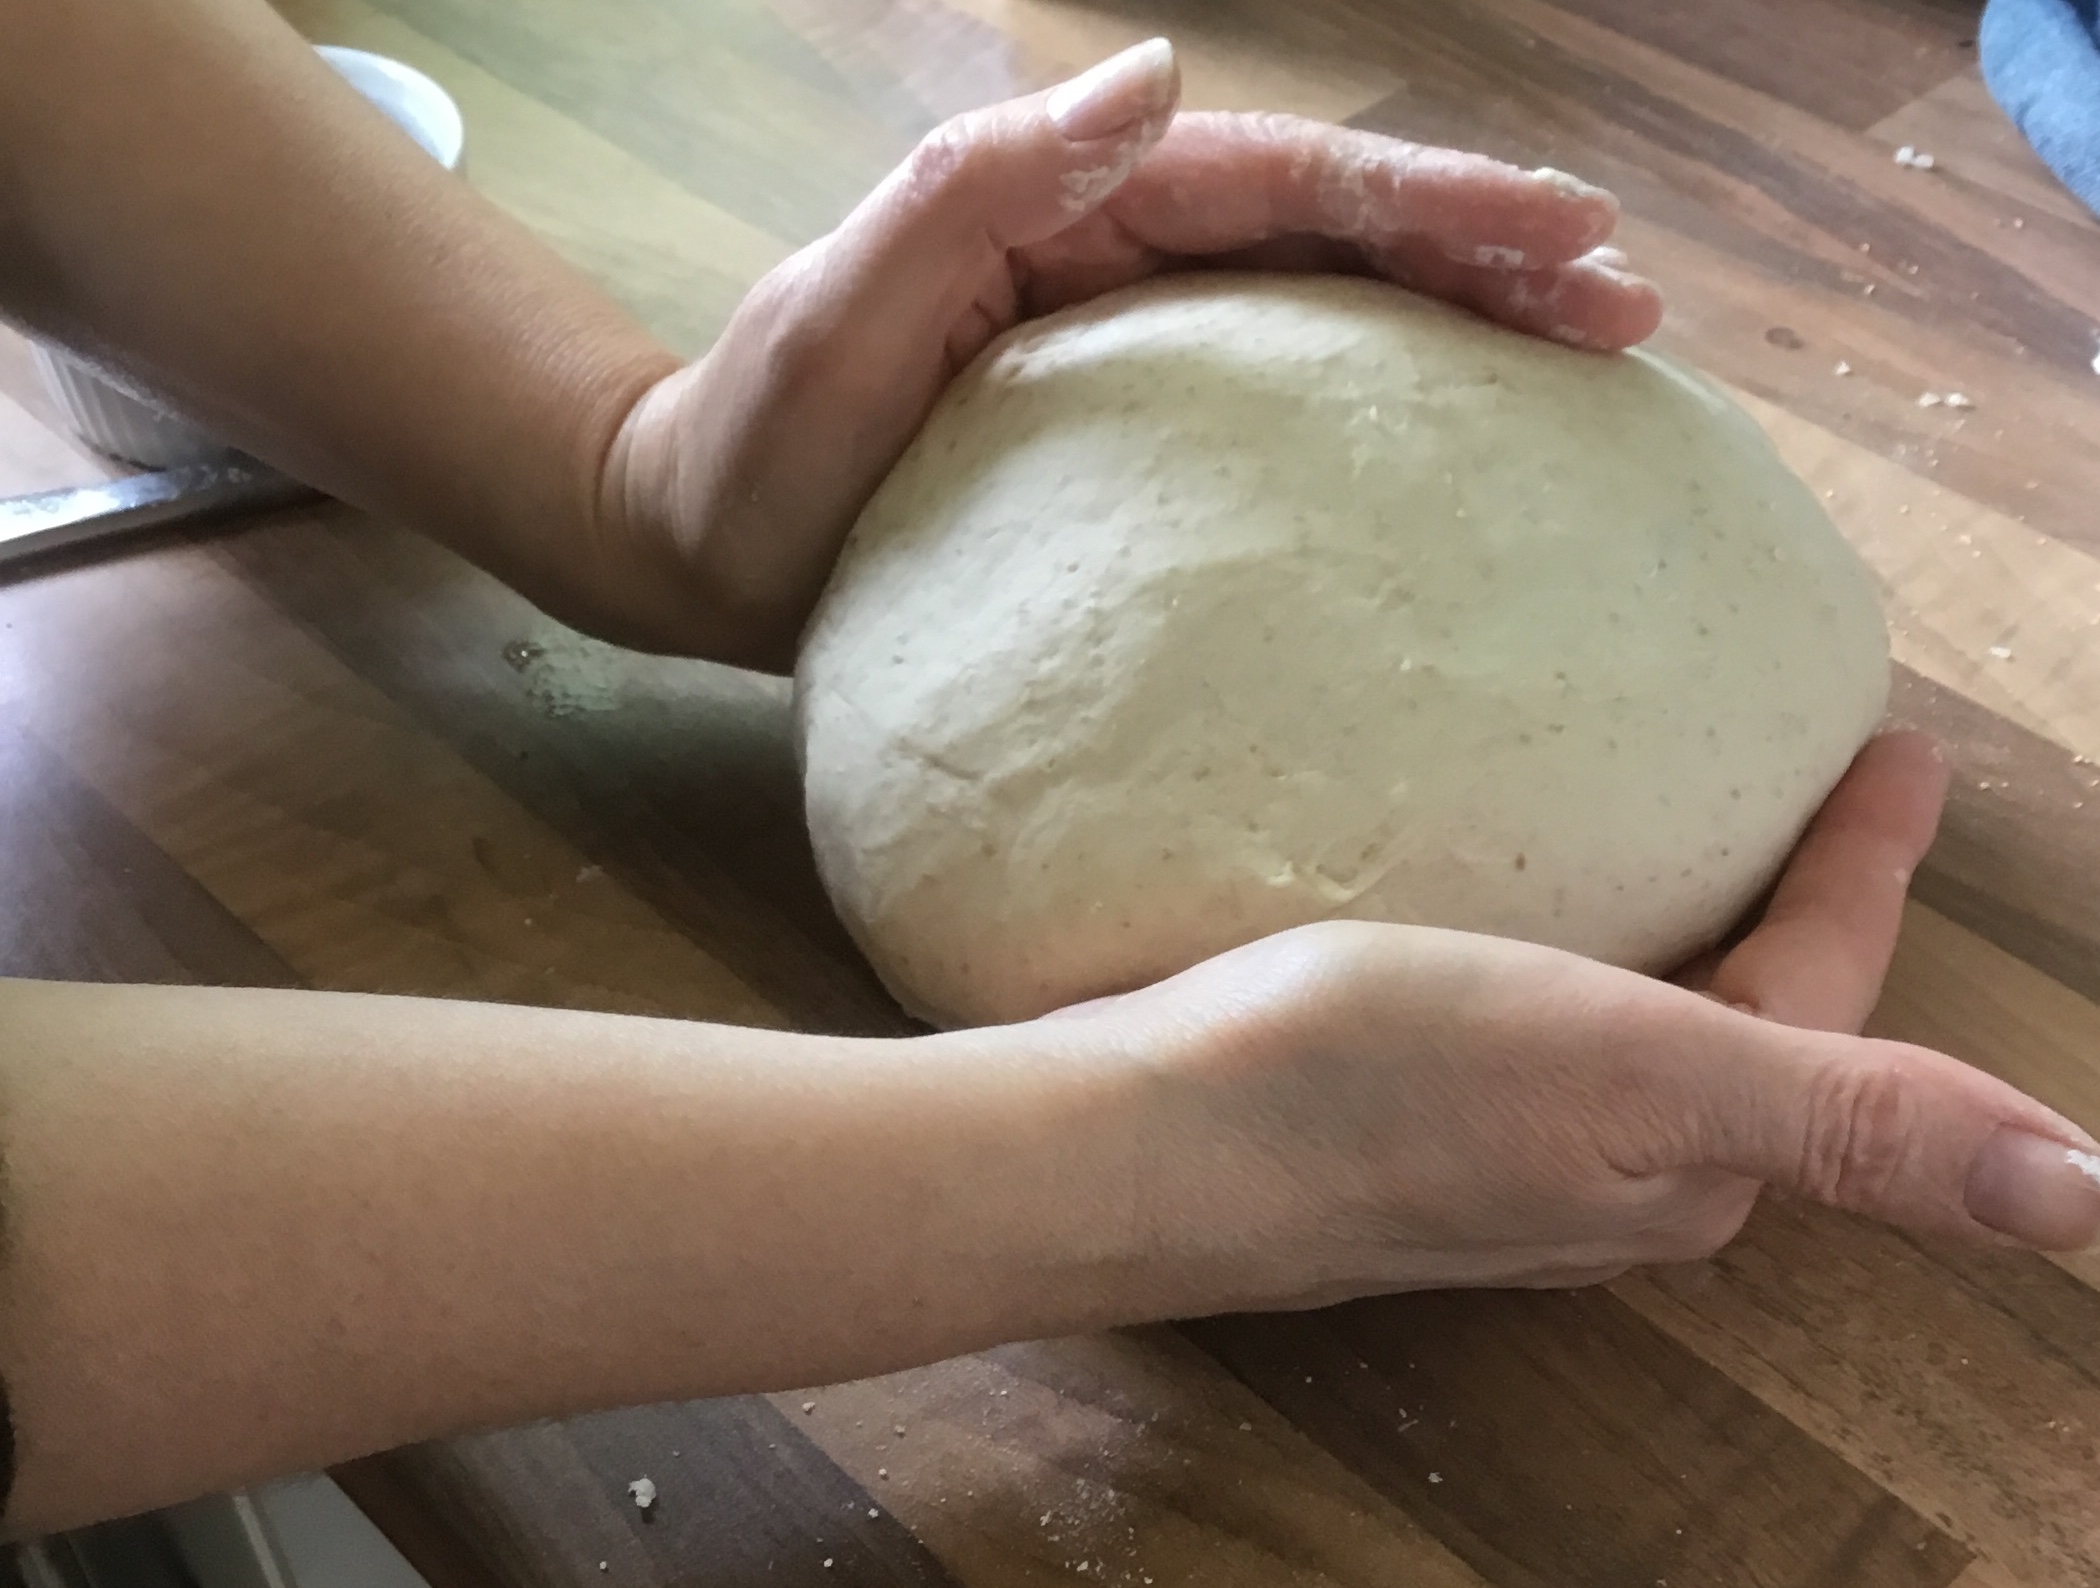
Tip your dough out of the bowl and turn it with one hand whilst cupping the underneath of the dough with the other hand. Keep turning and cupping until you have a ball. Turn this over and pinch the bottom together. This is the side you want to be at the top of your proving basket as it will form the bottom of your loaf when you turn it out.
place your round of dough inside the basket, cover again with a clean plastic bag (don’t use a damp tea towel at this stage or it will stick) and leave to rise, in a warm place this time, until roughly doubled in size. This might be only an hour or it could be three or four. It will depend on your environment, the time of year, your altitude and the temperament of your dough. Don’t expect it to rise above the basket. It should fill out the basket, rise appreciably and still be ‘bouncy’ to the touch. If you over-prove the dough you risk it collapsing when you come to bake it. You will be able to judge this stage better as you become more experienced.
You are now ready to bake you lovingly crafted loaf. Hurrah!
Preheat your oven to 250°C/220°C fan/gas mark 9 (or at least 220°C, if that’s as high as your oven will go). Many sourdough experts bake their bread in a Dutch oven or cast iron casserole dish, but I feel that for a novice this can be a step too far as you have to organise getting your dough out of the proving basket and into the Dutch oven without deflating the dough. It is far simpler to use a heavy duty baking sheet, and in my experience, works this perfectly well.
Get ready a clean gardener’s spray bottle full of water – you’ll be using this to create a steamy atmosphere in the oven, which helps the bread to rise and develop a good crust. If you don’t have one to hand you can achieve a similar effect with a roasting tin of boiling water placed on the bottom of the oven just before you put the loaf in. You are attempting to replicate the high temperature steam ovens that bakers use. I cook in a standard domestic oven and turn out creditable sourdough loaves and there’s no reason you can’t do the same.
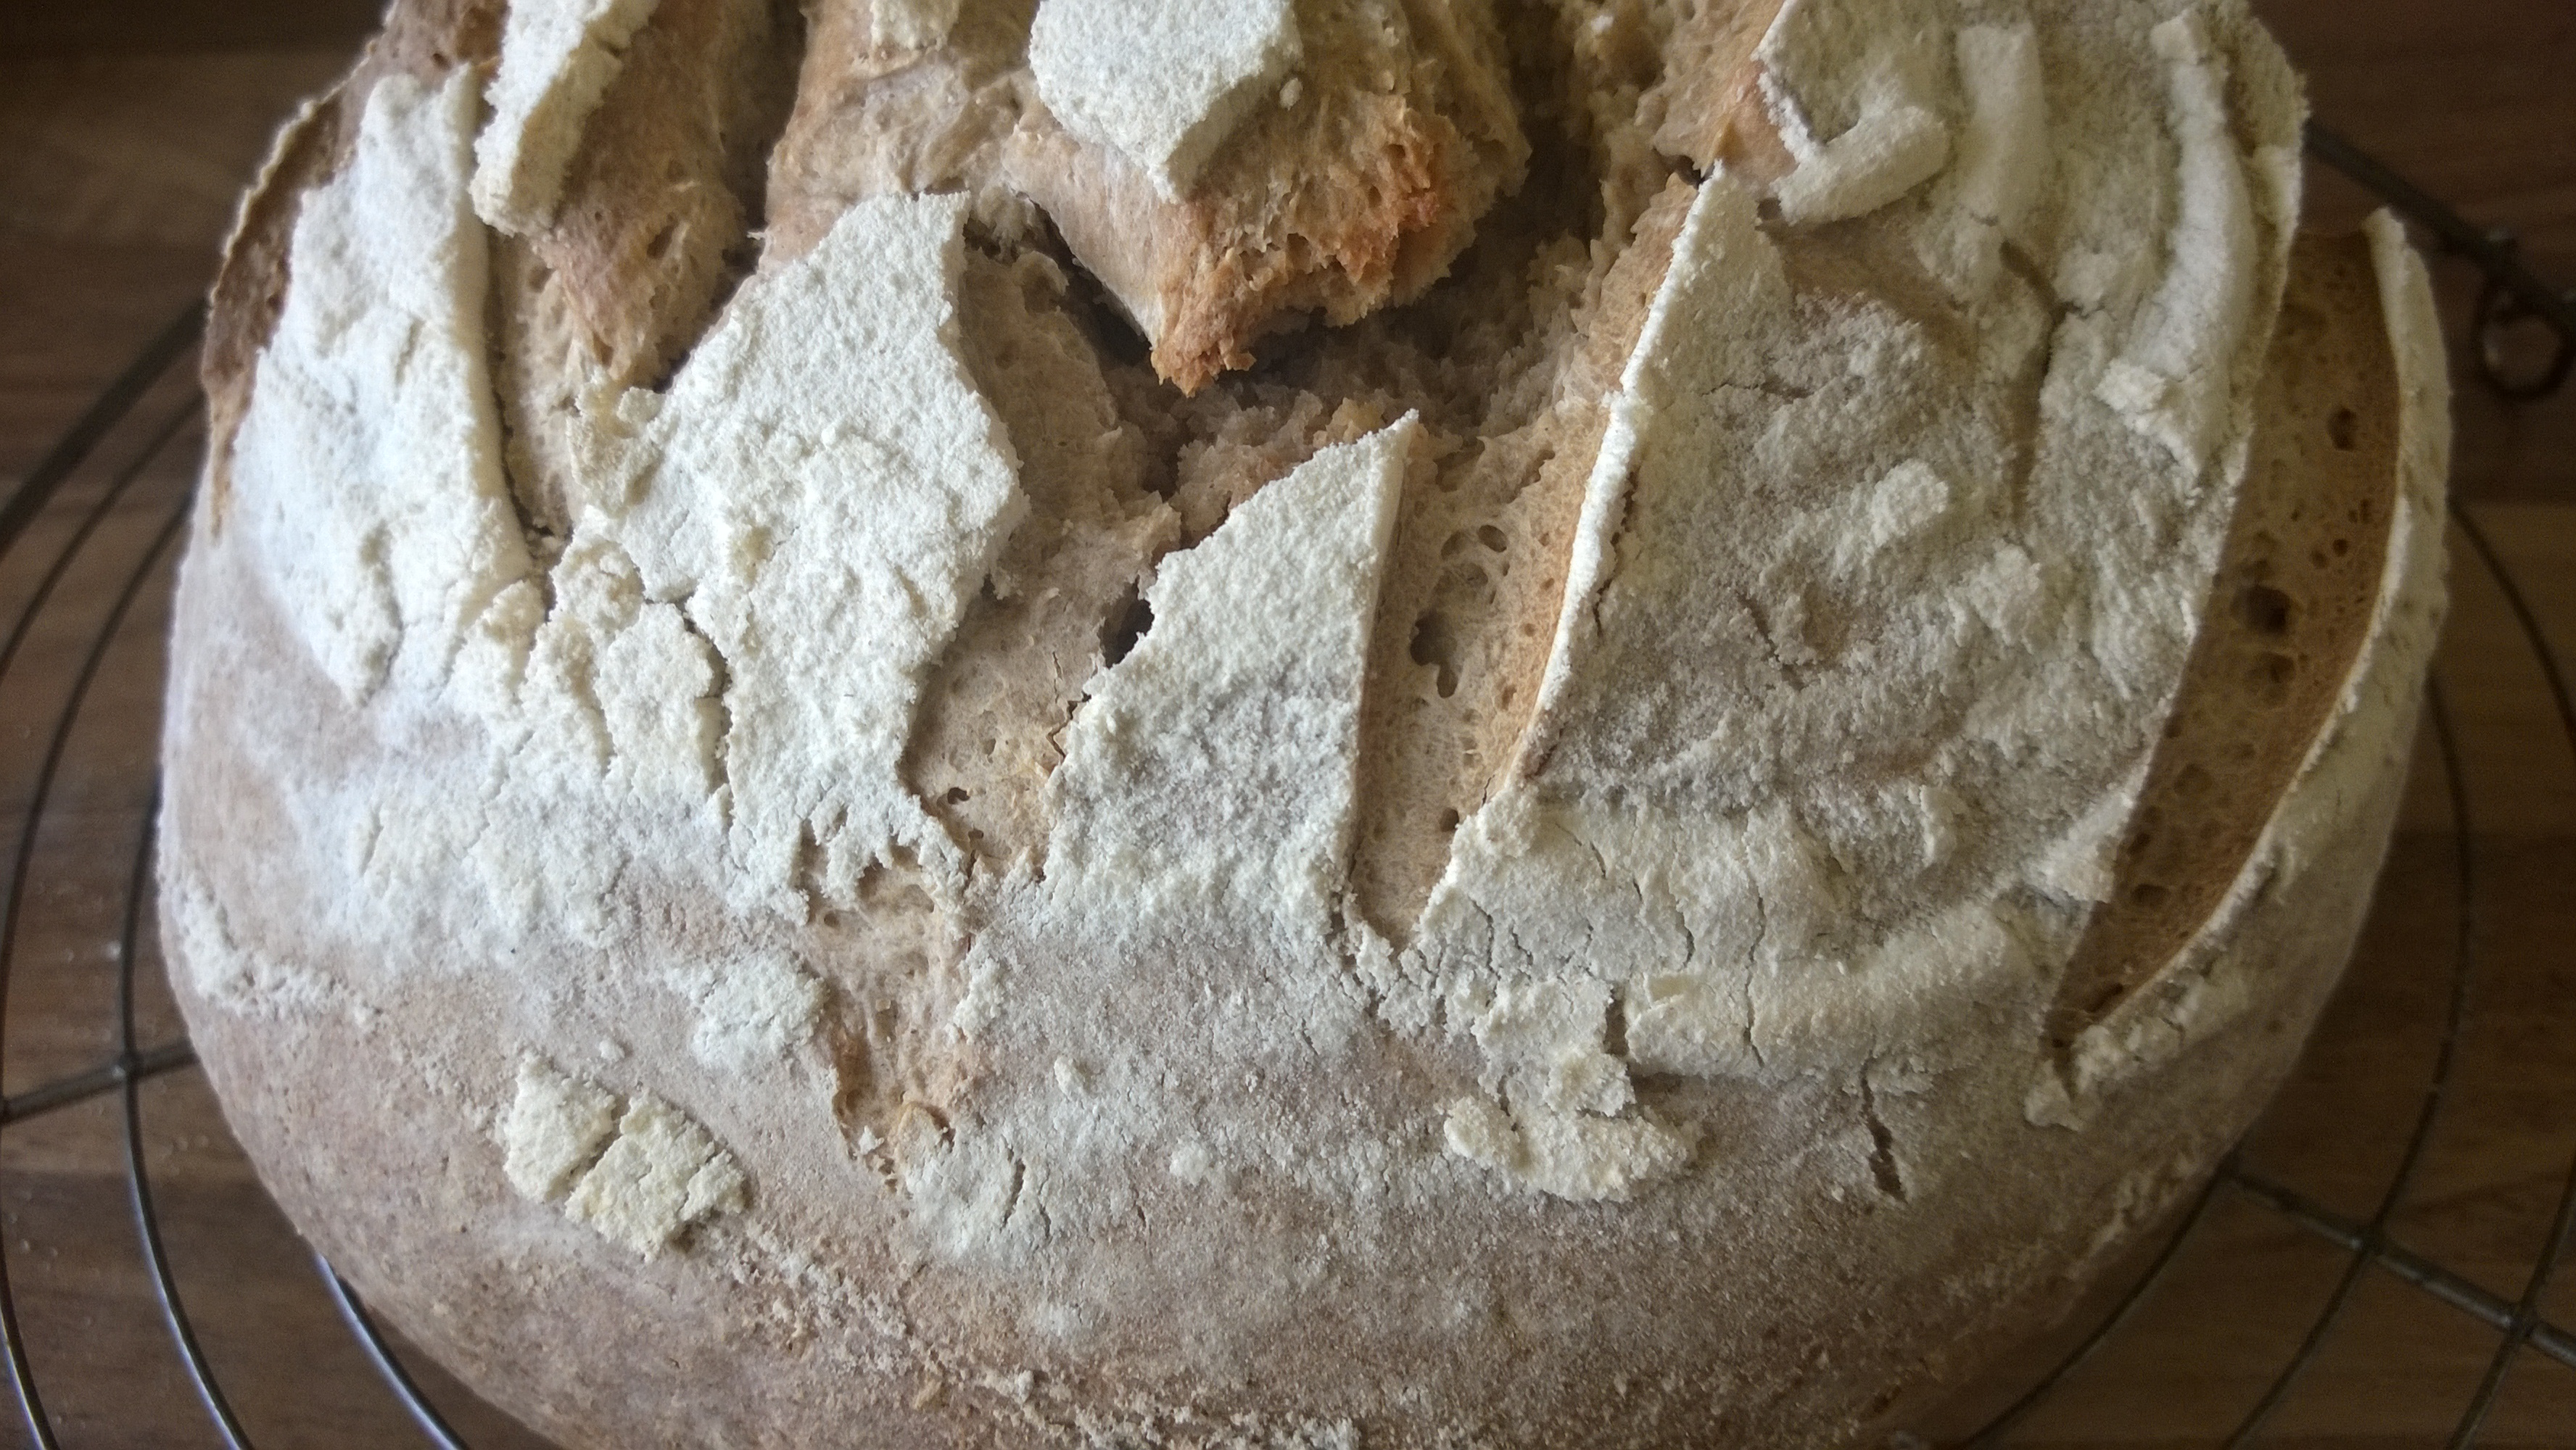
About five minutes before you want to put the loaf in the oven, put a heavy duty baking tray in the oven to heat up. Take the hot baking sheet from the oven, dust it with flour, and carefully transfer the risen dough to it by tipping it out of the proving basket/bowl, upside down, on to the sheet. Don’t hold it high above the tray. Hold it as close as you can and let it ease out very gently or you can knock the air out and deflate it. Now, working quickly, slash the top of the loaf a few times with a very sharp, serrated knife or even a razor blade. You can buy special tools to do this called a lame, if you’re keen.
Put the loaf into the hot oven and give a few squirts from the spray bottle over and around it. After 15 minutes, reduce the heat to 200°C/180°C fan/gas mark 6 and bake for a further 25-30 minutes, or until the well-browned loaf vibrates and sounds hollow when you tap its base.
Leave to cool completely, on a rack, before you plunge in with the bread knife.
Butter and enjoy!
If you get the sourdough bug and wish to learn more and try different recipes, I would recommend any books by Richard Bertinet and Andrew Whitley who are experts in the field of #realbread. Whatever you decide to do, please don’t buy ‘sourfaux’ – the supermarket bread that poses as real sourdough loaves – they aren’t.
I hope you find this blog post helpful. Please feel free to share your experiments here, on the Highland Home Cook Facebook page, or on Twitter.
I welcome feedback, so please leave any comments on this post here.
Good luck!